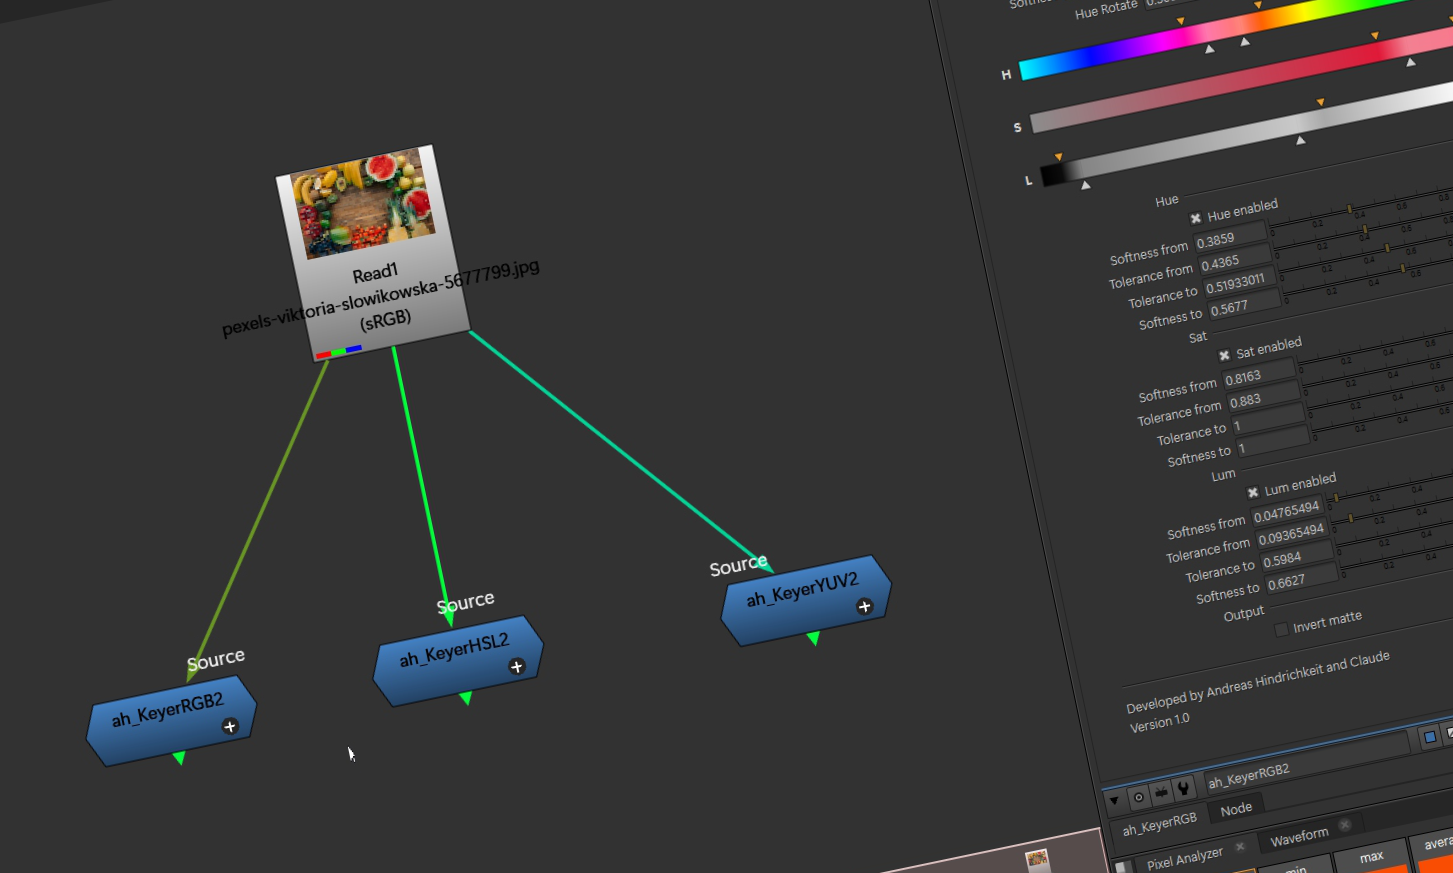
ah_Keyer Plugins – User Guide
Introduction
The ah_Keyer plugins bring the idea of the Keyer RGB from Autodesk Flame to Foundry Nuke: you pick a color in the image, and everything close to it becomes transparent. They are simple to use and very good at selectively isolating colors in an image, whether you want to remove a colored background, pull a single object by its color, or limit a grade to one color range.
There are three keyers, and each one works in a different color model:
- ah_KeyerRGB keys on Red, Green and Blue.
- ah_KeyerHSL keys on Hue, Saturation and Luminance.
- ah_KeyerYUV keys on Y (luma) and U/V (color difference).
Choosing the right keyer matters. Not every color can be keyed cleanly with every keyer. The RGB keyer in particular is not suitable for every color: it works well for colors that are clearly separated from the rest of the picture in the R, G and B channels, but it struggles when the same color appears in different brightnesses. See Which keyer for which color before you start.
All three tools take an RGB input and produce an RGBA output. The pixels that are hit become 100 % transparent, and the RGB values stay exactly as they were in the original image. Only the alpha channel is added.
Which keyer for which color
Pick the keyer that describes your color best. A color is easy to key when it forms one compact range in the channels you key on, and hard to key when it is scattered across them.
| Keyer | Keys on | Use it when | Be careful when |
|---|---|---|---|
| ah_KeyerRGB | R, G, B | The color is strongly defined by one or two channels, for example a pure red, green or blue, or a neutral black, gray or white area. | The color shows up in many brightnesses, for example a surface in light and shadow, or a mixed color such as orange, skin tones, or yellow-green. Its R, G and B values all move together, so a single range either misses parts of it or grabs other colors. |
| ah_KeyerHSL | Hue, Sat, Lum | You want to select by color regardless of brightness: a colored wall, a shirt, foliage, a sky. Hue selects the color, Sat separates strong from pale colors, Lum is off by default. This is the best choice for most colors. | The color is nearly gray (Sat close to 0): its hue is then unreliable. Use Sat and Lum, or the RGB keyer, instead. |
| ah_KeyerYUV | Y, U, V | The color is defined by its chroma, as in a blue or green screen, and you want to ignore brightness. Y is off by default, so you key on U and V only. | You need a clean hue selection across the whole color wheel: the HSL keyer is easier to read for this. |
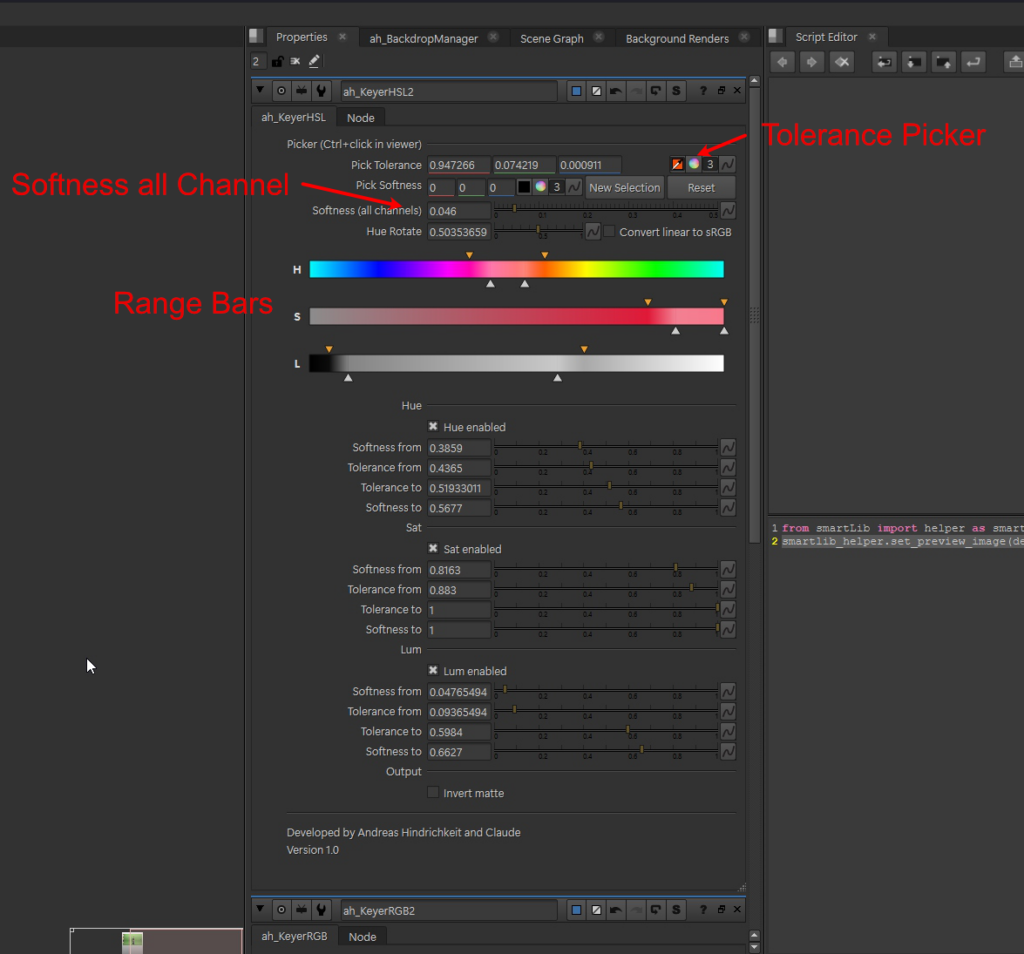
The interface
All three keyers share the same layout.
Step by step
This workflow is the same for all three keyers.
- Create the node from Nodes > Keyer and connect your image to its input. Choose the keyer that fits your color (see Which keyer for which color).
- Decide on sRGB. If you want to key on display values, switch on Convert linear to sRGB now, before picking.
- Pick the color. Use Pick Tolerance on the color you want to key. The first pick sets the range. Every further pick on a similar area extends the range, so you can collect light and shadow parts of the same color.
- Start over if needed. New Selection clears the current selection: the next pick replaces the range instead of extending it.
- Set the softness. After each pick, the softness markers are pushed outward by at least the value of the Softness (all channels) slider. Increase the slider for a softer edge, lower it for a tighter key.
- Refine with Pick Softness. Pick a color that should be only partly keyed, for example in the edge area. This extends only the outer softness markers up to the picked value. Note that a color picked this way lies exactly on the outer edge, where the matte is still 0.
- Fine-tune by hand. Drag the markers on the range bars or type values. Switch off channels that do not help the key.
- Check the result. View the alpha channel, or place a colored background behind the keyer. Use Invert matte if you want to keep the color instead of removing it.
Hue keys (ah_KeyerHSL only). The hue bar always runs from 0 to 1 and does not wrap around. For colors near red, where the hue jumps from 1 back to 0, the Hue Rotate control turns the colors under the bar. The picker sets this automatically: the picked hue is moved to the middle of the bar, and the rotation is adjusted if needed. Picking gray pixels (Sat close to 0) does not change the hue range.
Tips and limitations
Tips
- If the key is patchy in shadows or highlights, the color is spread out in your keyer’s channels. Switch to HSL (select by hue) or YUV (select by chroma).
- Pick several spots, in light and in shadow, instead of widening the markers by hand. Each pick extends the range only as far as needed.
- Keep the keyed range tight and use softness for the edges. A wide tolerance range grabs neighboring colors.
- Switch off channels that do not help. In HSL, a hue and saturation key without luminance is often enough.
- Decide on the sRGB option before you pick, not afterwards.
Limitations
- The softness falloff is a straight line, not a smooth curve.
- A color picked with Pick Softness lies on the outer edge and is not yet keyed there.
- Nodes created with an older version are not updated; create a new node to get the current panel.
- Scripts need the plugin path on every machine that opens them, otherwise the range bars are missing.
Possible future additions: Rec.601 option for the YUV keyer, hue in degrees, a smoother softness curve.
Developed by Andreas Hindrichkeit and Claude. Version 1.0.